The bathroom can take an hour to scrub and still look dull. Water spots return to the glass, dust sticks to wet tile, and a strong scent hides the fact that the grout never became clean. Professional results often come from a quieter secret: order.
Start in the wrong place and every later step undoes the last. Begin with the right sequence, and ordinary detergent, microfiber, and patient contact time do more work. This professional bathroom secret begins before the first drop touches tile.
Clear the Room Before You Spray
Remove towels, bath mats, bottles, toothbrushes, bins, and anything sitting on the floor. Put washable fabrics aside and discard empty containers. A clear surface can be cleaned edge to edge instead of traced around clutter.
Open a window or run the exhaust fan. Read every product label before use, including surface warnings, protective equipment, dilution, and contact time. Put on gloves when the label calls for them.
Choose One Cleaning System
Never mix bleach or any disinfectant with another cleaner. Bleach plus acid, including vinegar or many toilet products, can release dangerous gas. Bleach plus ammonia is also dangerous. A homemade mixture should never be poured into a bottle that once held another chemical.
When changing products, rinse the surface and tools well. If fumes cause coughing, burning eyes, or trouble breathing, leave for fresh air and contact local emergency or poison-control services.
Work From Dry and High to Wet and Low
Dust the vent cover, light fixture, upper shelves, and window ledge with a dry microfiber cloth or suitable vacuum attachment. Then wipe the mirror frame, cabinet tops, and door. Dry dust is easier to capture before steam or spray turns it into mud.
Save the floor for last. Hair and dust will fall while the sink, toilet, and shower are cleaned. Moving from the cleanest zones toward the dirtiest also reduces the chance of spreading toilet soil to handles and taps.
Let Detergent Break the Bathroom Film
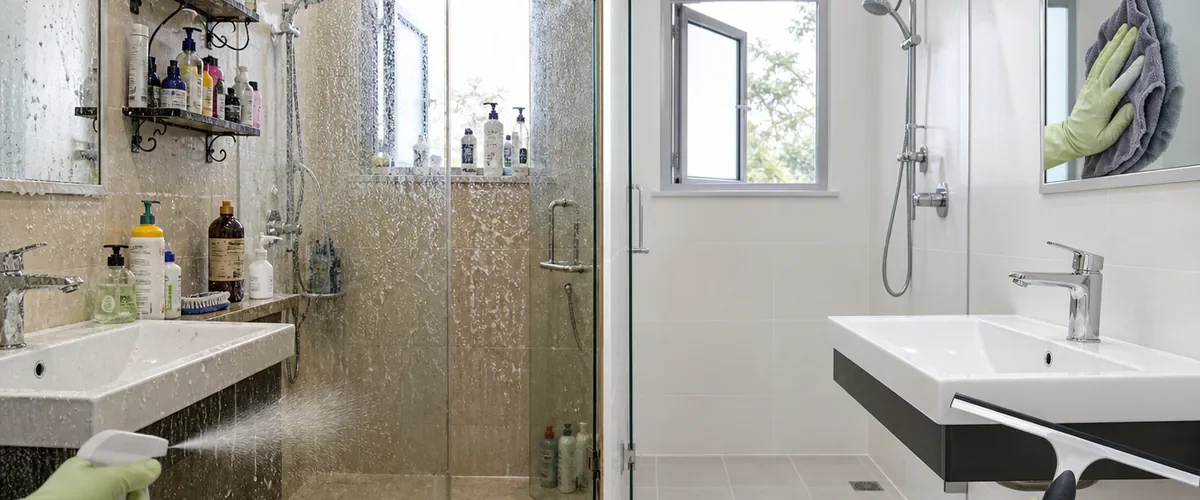
Soap scum contains body oils, soap residue, and minerals. Warm water with a small amount of dish detergent or a bathroom cleaner labeled for the surface can loosen that film. Apply it to a cloth or non-scratch sponge when overspray could reach wood, electronics, or painted walls.
Give the cleaner the label’s stated time to work, then wipe with gentle pressure. More product creates more rinsing and can leave a sticky haze. A white non-scratch pad may help on durable surfaces, but test a hidden spot first.
Match the Tool to the Finish
Glass, acrylic tubs, coated fixtures, stone, and metal finishes do not share the same care rules. Abrasive powders and rough pads can scratch. Acidic cleaners can damage marble, limestone, cement grout, and some metal or plated surfaces. Follow the fixture or surface maker’s instructions.
Make Shower Glass Clear Without Chasing Streaks
Wash soap film first. Rinse with clean water, then pull a squeegee from top to bottom in overlapping lines. Dry edges and hardware with a clean microfiber cloth.
Vinegar may help with mineral deposits on some acid-safe glass and tile, but it is not suitable for every frame, seal, grout, or nearby stone. Never combine it with bleach. If the manufacturer allows it, use a tested small area and rinse afterward.
Clean the Sink in Two Passes
First wash the basin, counter, taps, drain area, and overflow with detergent. Use a small brush around seams without scratching the finish. Rinse away loosened soil.
Then dry and polish with a fresh microfiber cloth. The dry pass removes remaining droplets that turn into spots. Clean the handle and soap dispenser last with a separate clean section of cloth because they are touched often.
Give the Toilet Its Own Tools
Use dedicated gloves, cloths, and a brush for the toilet. Apply bowl cleaner according to its label. Wipe the tank handle, lid, seat, hinges, rim, outer bowl, and base from cleaner areas toward dirtier ones.
Do not use the same cloth on the sink afterward. Launder reusable cloths on an appropriate setting and let brushes dry before storage. Never mix a toilet-bowl product with bleach unless one product label clearly states that exact use.
Clean First, Disinfect Only When Needed
For routine homes, soap or detergent and water remove most dirt and many germs. Disinfection may be useful when someone is ill or for a contaminated high-touch surface. It is a separate step, not a stronger word for cleaning.
Choose an EPA-registered disinfectant that lists the surface and follow the label. The area often must stay visibly wet for a set contact time. Spraying and wiping immediately may not meet it. Improve ventilation and keep children and pets away until the directions say the surface is ready.
Handle Grout and Mold Honestly
Dirty grout may respond to detergent, a soft brush, rinsing, and complete drying. Hydrogen peroxide can discolor some materials and should not be mixed with vinegar or other cleaners in one container. Test products and follow their labels.
Mold keeps returning when moisture remains. Run the fan during bathing and afterward, repair leaks, dry wet edges, and wash the shower curtain as its care label permits. Large mold growth, sewage, repeated wall damage, or health concerns may require professional help.
Finish With the Floor and a Dry Room
Vacuum or sweep remaining hair. Mop with a cleaner approved for the floor, beginning at the far corner and working toward the door. Avoid soaking seams, wood trim, and porous materials.
Return dry mats and bottles only after surfaces are dry. Leave the fan running long enough to clear moisture. Between deep cleans, a quick squeegee and a wipe of taps can prevent the next buildup.
A professional cleaner’s bathroom secret starts before the first drop touches tile. Clear the space, ventilate, remove dry soil, work high to low, and let one compatible product finish its job. The sparkle comes from sequence and clean tools, not a risky chemical cocktail or a cloud of perfume.