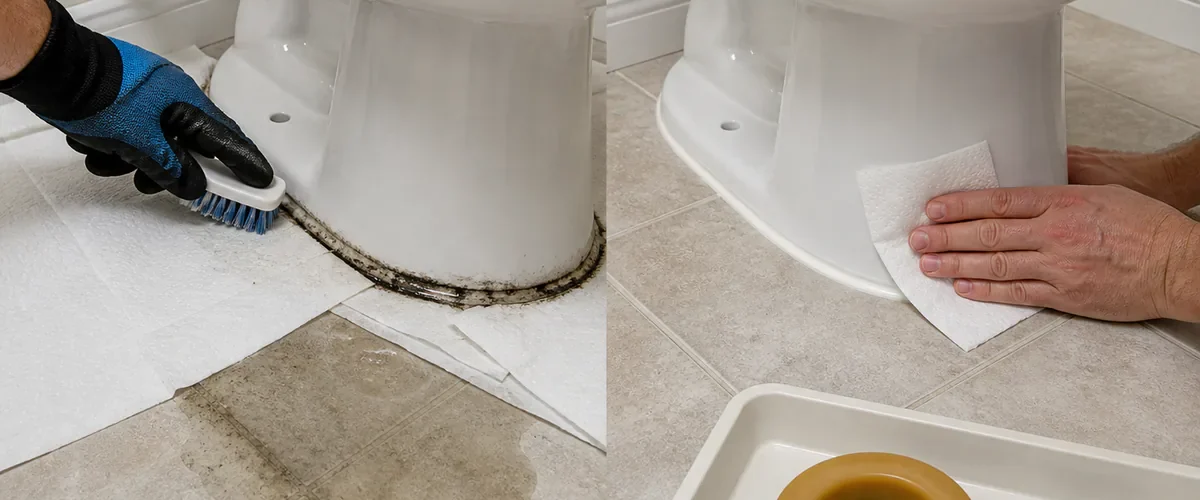
The black ring hugs the toilet base so neatly that it looks drawn on. A brush lightens one section, but the line returns. The obvious answer is stronger cleaner and harder scrubbing.
Stop before soaking the seam. That ring may be ordinary dirt caught on old caulk, but it can also mark recurring moisture, mold, a loose toilet, or a failed seal beneath the bowl. Cleaning the color without finding the water can hide the most important clue.
Dry the Area Before Diagnosing It
Remove bath mats and objects around the toilet. Put on gloves and ventilate the room. Clean loose dust with a damp disposable cloth, then dry the floor and base completely.
Place dry paper towels around the seam. Flush several times while watching the tank, supply line, shutoff valve, floor bolts, and base. Press fresh tissue against each area to locate the first moisture.
Look Beyond the Base
Water can run from a sweating tank, loose supply connection, or faulty tank hardware and collect at the floor. Condensation may form during humid weather. A wet base does not automatically identify the wax ring, so follow the water upward first.
Stop Using a Toilet That Leaks From Below
If water appears at the base during or after a flush, the seal between the toilet and drain may have failed. Wastewater can damage flooring and the structure beneath it. Stop using the toilet and arrange qualified repair.
A rocking bowl, soft floor, sewage odor, or staining below the bathroom adds urgency. Tightening bolts blindly can crack porcelain. The toilet may need removal, floor inspection, and a new seal installed on a sound flange.
Decide Whether the Black Ring Is on or Under the Caulk
Surface grime should lift from intact smooth caulk with gentle cleaning. Mold can grow where moisture and organic soil remain. If black color sits beneath translucent silicone, returns from inside a split, or the caulk is loose and missing, wiping the surface will not restore the joint.
Do not apply fresh caulk over a wet or moldy seam. The area must be repaired, cleaned, and dried first. Caulk can improve cleanability and help reveal future leaks, but it should never trap active wastewater.
Clean a Small Intact Area Safely
For a minor mark on sound caulk with no leak, start with warm water and a little detergent approved for the floor and fixture. Apply it to a soft cloth or brush, work gently, rinse, and dry.
Abrasive powder and hard scouring pads can scratch porcelain, stone, or flooring and tear silicone. Acidic vinegar and lemon can damage marble, limestone, cement grout, and some metal finishes. Hydrogen peroxide can discolor materials. Check manufacturer instructions and test a hidden spot.
Never Mix Bathroom Cleaners
Do not combine bleach with vinegar, toilet-bowl cleaner, ammonia, or any other cleanser. Dangerous gas can form. Use one product at a time, follow its label, keep the room ventilated, and wear the stated protective equipment.
If fumes cause coughing, burning eyes, or difficulty breathing, leave for fresh air and contact local emergency or poison-control services.
Treat Mold as a Moisture Problem
Small mold growth on a hard surface can often be scrubbed with detergent and water, then dried completely. People with asthma, significant allergies, immune suppression, or lung disease should avoid mold cleanup and seek advice.
Larger growth, repeated moisture, sewage exposure, or damage extending into porous flooring needs professional assessment. Mold inside porous or failed caulk may require the caulk to be removed and replaced after the water source is fixed.
Replace Failed Caulk Only After Repair
If no plumbing leak exists and the joint is simply old, remove failed sealant without scratching the fixture or floor. Clean away residue and let both surfaces dry fully. Apply a bathroom sealant compatible with the materials according to its instructions.
Leave any opening or caulking pattern required by local plumbing practice and the toilet manufacturer. Do not use the toilet until the product has cured for the stated time. When installation or floor condition is uncertain, hire a plumber.
Prevent the Ring From Returning
- Run the exhaust fan during bathing and afterward
- Wipe floor water before it reaches the toilet seam
- Clean the base gently during regular bathroom care
- Check the supply line and valve for slow drips
- Investigate rocking, odor, or new moisture immediately
Keep the floor around the toilet clear enough to inspect. A hidden mat can hold dampness against the seam and delay discovery of a leak.
The Ten-Minute Tissue Test
- Clean and dry the toilet base.
- Place dry tissue around every connection and seam.
- Flush, wait, and repeat.
- Trace moisture to its highest point.
- Stop use and repair any base leak.
That black ring around your toilet base may be hiding more than dirt. Test for water before reaching for a miracle mixture, and never seal over a damp clue. Once the leak or humidity source is corrected, gentle cleaning and sound caulk can keep the base bright instead of merely hiding the next problem.