A rose bouquet fades, but one healthy stem can hold the beginning of another plant. That possibility feels almost magical: trim a branch, settle it into a plain pot, and wait for roots that were not there before. The secret is not an expensive device. It is a clean cutting, a draining medium, steady humidity, and enough patience to leave the stem alone.
Gardeners often try to propagate rose cuttings in sand because sand drains quickly and supports the stem. Pure fine sand, however, can compact or dry unevenly. A clean coarse propagation sand blended with perlite or a sterile soilless mix gives beginners a more forgiving balance of moisture and air.
Why the Sand Method Can Work
A cutting has no roots at first, yet its leaves continue losing moisture. The rooting medium must hold enough water to prevent wilting while leaving oxygen around the buried stem. Waterlogged garden soil can rot the base. A loose, clean mix creates the airy conditions new roots need.
Success also depends on the rose. Some varieties root readily, while others are stubborn. A failed stem does not mean the entire method is false. Start several cuttings so one loss does not end the project.
What You Need
- A healthy, nonpatented rose you have permission to propagate
- Clean, sharp pruners
- A small pot with drainage holes
- Clean coarse sand plus perlite, or sterile seed-starting mix
- Rooting hormone labeled for cuttings, optional but helpful
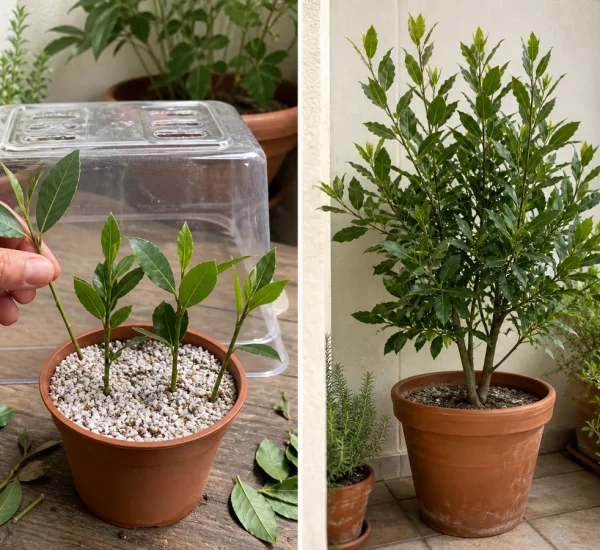
- A clear bag or cut plastic bottle for a humidity cover
- A pencil or dibber
Do not collect a stem from a rose showing black spots, cankers, insects, or weak yellow growth. Disease and stress travel with the cutting.
How to Propagate Rose Cuttings in Sand
1. Choose Young, Firm Growth
In spring or early summer, select a flexible green stem that has begun to firm. Cut a piece about 6 to 8 inches long with several nodes. A node is the slight joint where a leaf meets the stem. Make the bottom cut just below one because rooting activity often concentrates nearby.
2. Reduce Moisture Loss
Remove the flower, bud, and leaves from the lower half. Keep two small leaves near the top. If they are large, cut each leaf in half. This leaves some surface for photosynthesis without asking the rootless stem to support a full canopy.
3. Prepare the Pot Before the Stem
Moisten the propagation mix until it feels evenly damp, not muddy. Fill the pot and let it drain. Use a pencil to make a planting hole. That hole protects optional rooting powder from being rubbed off as the stem enters the mix.
4. Set Two Nodes Below the Surface
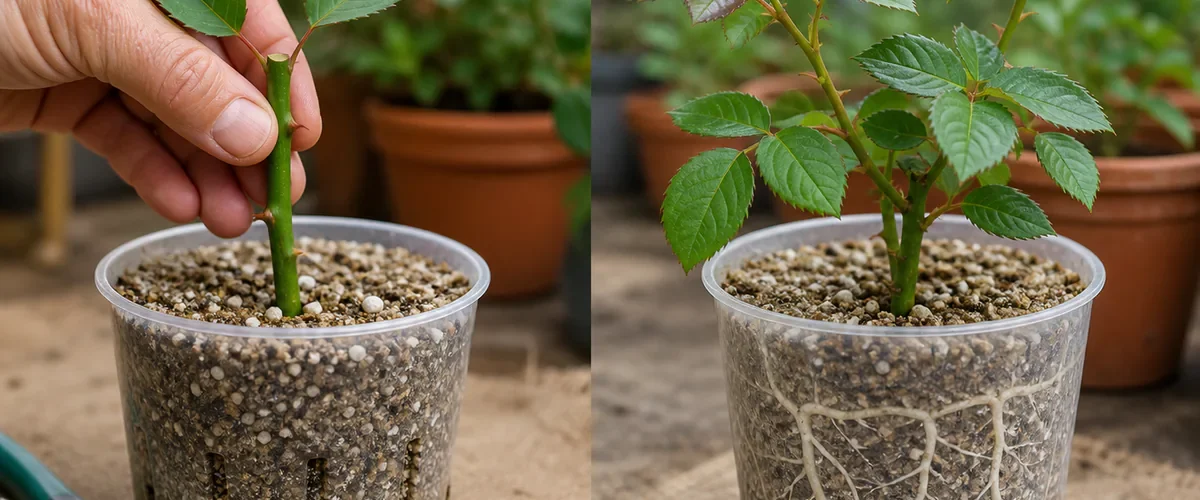
Dip the lower end in rooting hormone according to its label and tap away the excess. Insert the cutting about 3 inches deep, with at least two nodes buried. Firm the mix gently so the stem stands upright, then label the variety and date.
5. Build a Tiny Humid Room
Cover the pot with a clear bag or bottle, keeping plastic away from the leaves with small stakes. Place it in bright indirect light. Direct midday sun can turn the cover into an oven and cook the cutting.
The Waiting Period That Protects New Roots
Check the medium every few days. It should remain lightly moist, never soaked. Open the cover briefly if heavy drops coat the plastic or mold appears. Remove fallen leaves at once.
Roots may begin in several weeks, but timing varies. New leaves alone do not prove a root system exists because a stem can spend stored energy. After four to eight weeks, give the cutting the lightest upward tug. Resistance suggests roots. Do not pull it out just to look.
Mistakes That Turn the Miracle Into Mush
- Using beach or play sand without checking it. Salt, very fine particles, or contamination can harm cuttings.
- Keeping the pot in full sun. High heat dries or cooks tender tissue.
- Watering every day. The cover slows moisture loss; constant watering removes oxygen.
- Leaving the bloom attached. The cutting wastes limited energy on a flower instead of roots.
- Transplanting at the first new leaf. Tiny roots break easily and need time to strengthen.
Move the Rooted Rose Without Shocking It
Once roots hold the mix together and healthy new growth continues, open the cover a little more each day for about a week. This slowly lowers humidity. Then move the young rose into a small pot of quality potting mix at the same depth. Keep it protected from harsh sun and wind while it adjusts.
Wait for active growth before feeding lightly. A large dose of fertilizer cannot speed up fragile roots and may burn them. Also remember that roses sold under an active plant patent cannot legally be propagated without permission in some countries.
The wonder of this method is real, even if it is not instant. When you propagate rose cuttings in sand or another airy medium, a bare stem can quietly build its own root system. Clean tools, soft light, and restraint do more than any dramatic shortcut.