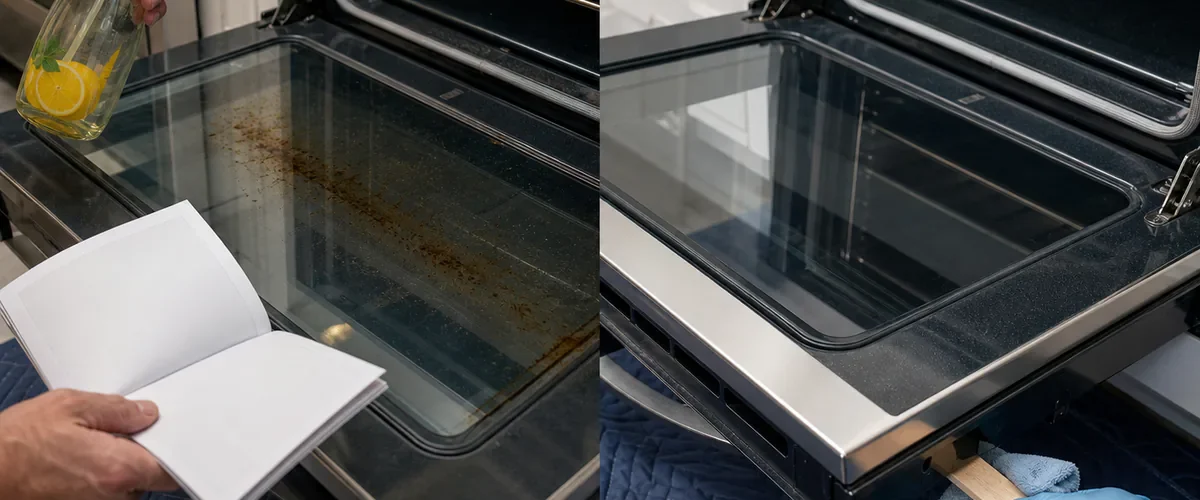
The outside of the oven door gleamed, but a brown streak remained trapped between the two panes. A homemade cleaning wand seemed like the perfect answer. One safety check stopped the job: this model had a camera and no owner-approved access slot.
Hidden oven-glass grease can often be cleaned, but door designs vary. Some manufacturers provide a lower opening and a specific method. Others require service. Before sliding a stick, hanger, or wet cloth into the door, find the model manual and follow its instructions.
Let the Oven Become Completely Cold
Turn the oven off and wait until the door, glass, and frame are cool. Unplug the appliance or switch off its circuit when the manual requires it. Keep children and pets away from the work area.
Place towels on the floor or a stable work surface. Oven doors are heavy, and tempered glass can break from impact, pressure on an edge, or sudden temperature change.
Find the Model Number and Door Diagram
Search the manufacturer’s support site for the exact model. Look for sections called door removal, cleaning between glass, window cleaning, or service. Check whether the oven has a door camera, side-swing hinge, locked panel, or coating that limits cleaning products.
If the directions do not describe owner cleaning between the panes, stop. A technician can disassemble the door without disturbing insulation, hinges, wiring, seals, or calibrated glass spacing.
Use an Access Slot Only When Approved
Some doors have openings along the bottom. An approved method may use a thin wooden yardstick wrapped in a soft lint-free cloth and secured firmly. Do not use a sharp metal hanger that can scratch coatings, catch wiring, or chip glass.
Dampen the cloth with warm water and a small amount of mild dish soap. It should be wet enough to soften grease but not dripping. Insert it through the approved opening without forcing it between the panes. Let the damp cloth rest on a stubborn mark for a few minutes, then wipe gently.
Rinse the cloth, wring it well, and remove the soap. Finish with a dry lint-free cloth so water does not remain inside the door.
Know When the Door Must Come Off
Some manufacturer procedures begin by removing the complete door and placing it handle-side down on a padded surface. The hinge locks and removal angle differ by model. Follow the illustrated steps, wear sturdy gloves, and ask another adult for help with a heavy door.
Never lift by the handle. Do not unscrew glass panels unless the manual specifically makes that an owner task. A spring-loaded hinge can snap shut, and replacing panes in the wrong order can affect heat control.
Reinstall the Door Before Testing
Seat both hinge arms at the same angle and depth shown in the instructions. Lock the hinges only after the door is fully open and correctly supported. Close it slowly for the first check. The gap should be even, the handle firm, and the door should not scrape or drop.
Do not run the oven if the door sits crooked, a hinge lock will not engage, or the glass moves. Arrange service. Heat testing a badly seated door can send hot air toward controls and nearby cabinets.
Avoid the Cleaner That Creates a New Problem
Lemon juice, strong citric acid, oven cleaner, abrasive powder, and steel wool may damage seals, coatings, trim, or printed markings. Keep all liquid away from door vents, cameras, wiring, and the gasket.
Never mix cleaning chemicals. Vinegar or citric acid combined with chlorine bleach can release dangerous gas. Use only the product and dilution approved for the model.
Clean the Accessible Glass First
Many marks that appear trapped are actually on the inner or outer surface. Clean the cool exterior with the allowed product. For the interior pane, follow the manual; a damp soapy cloth or nonabrasive cleaner may be approved.
Do not rub a delicate oven gasket. If it is frayed, displaced, or torn, arrange replacement. A damaged seal can affect cooking performance and heat around the door.
Prevent the Next Brown Streak
- Wipe fresh splashes after the oven cools
- Cover foods that spit grease when the recipe allows
- Keep foil and liners away from blocked vents
- Do not spray cleaner toward door openings
- Inspect the gasket without pulling it
Stop When Something Feels Wrong
A stuck hinge, loose pane, cracked glass, moisture near wiring, or tool that will not move freely is a reason to stop. Photograph the issue and contact authorized service rather than forcing the shortcut.
Allow the cleaned space to dry completely before restoring power. If moisture remains trapped between panes, leave the door open only as the manufacturer permits and wait. Clouding that does not clear may require service rather than more liquid.
The hidden grease can vanish, but the safe door check comes first. Cool the appliance, read the exact manual, use only an approved opening and mild cleaner, and dry every surface. The clean view is satisfying because the glass, seal, and hinge remain exactly where the maker intended.