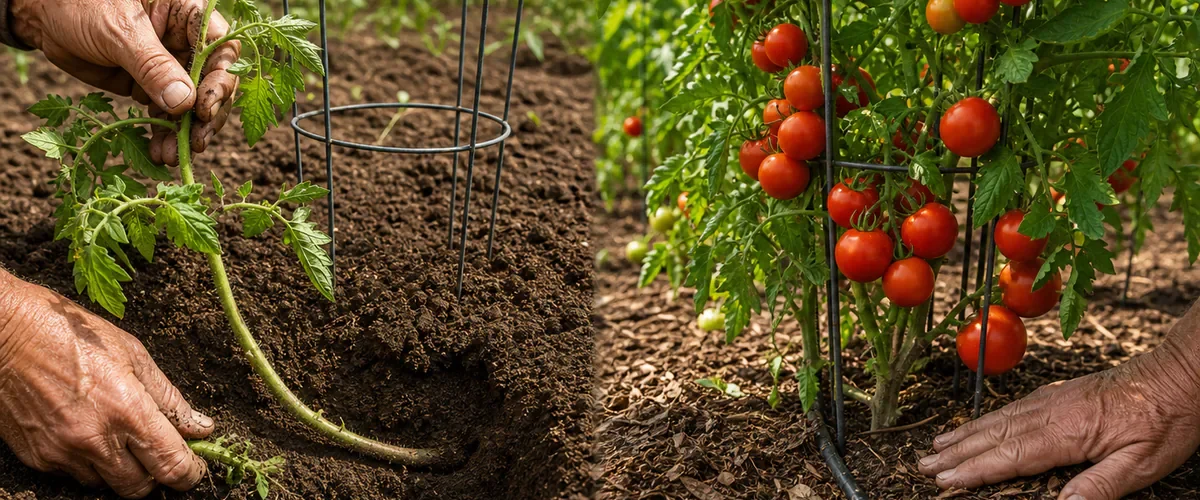
My grandfather never planted a tomato at the same depth it grew in the tray. He pinched off the lowest leaves, dug farther down, and lowered a long section of stem into warm soil. The seedling looked shorter that afternoon.
Weeks later, it stood like a different plant. Tomatoes can form roots along buried stems, creating more contact with soil and a stronger anchor. The method is real, but the generous harvest depends on what happens before and after the hole is filled.
Choose a Healthy Seedling First
Start with a compact transplant that has a firm stem, healthy leaves, and no suspicious spots, insects, or wilt. A tall leggy plant can benefit from deeper planting, but burying a diseased stem does not cure it.
Harden seedlings outdoors gradually for about a week, increasing sun and wind exposure while protecting them from cold. Transplant after frost danger has passed and the soil has warmed. A cold root zone can stall growth no matter how carefully the stem is placed.
Remove Only the Leaves That Will Be Buried
Pinch or cut off the lowest leaves with clean hands or tools. Leave the upper healthy canopy intact. Any leaf placed under soil can decay, and a wound packed with wet earth may invite trouble.
Plant the tomato deep enough that the remaining leaves stay comfortably above the soil. One practical guide is to set the stem near the first true leaves, but seedling size and soil temperature matter. Do not bury the growing tip.
Use a Trench for a Very Leggy Plant
When deeper soil is still cold or the seedling is extremely long, make a shallow horizontal trench. Lay the lower stem gently along it and curve the leafy top upward without snapping it. Cover the bare stem and mark the route so a stake does not pierce it later.
This Trick Belongs to Tomatoes
Tomato stems readily make adventitious roots under suitable conditions. Many other vegetables should remain at their original soil line. Do not bury peppers, cucumbers, or woody plants deeply simply because the method worked on a tomato.
Even tomatoes need airy soil. A deep hole in heavy, waterlogged ground can become a sump. Improve drainage across the bed rather than filling one hole with a rich loose mix that holds water differently from the surrounding soil.
Install Support Before Roots Spread
Set a cage, stake, or trellis when planting. Later, the buried stem will form roots in places you may not expect. Driving a support through that zone can wound them.
Match support to the variety. Determinate tomatoes stay more compact, while indeterminate vines can keep growing and need a taller structure. Tie stems loosely with soft material.
Water the New Root Zone Completely
After planting, water deeply to settle soil around the stem and remove large air pockets. Then monitor moisture instead of soaking on a daily calendar. Roots need both water and oxygen.
Apply two to three inches of clean organic mulch after the soil warms, leaving space around the stem. Mulch slows evaporation, reduces soil splash, and keeps moisture steadier as fruit begins to expand.
Feed From a Soil Test, Not the Fireplace
The old method may include fireplace ash or fermented nettle liquid. Wood ash can raise soil pH and add potassium, but the dose depends on the ash and soil. It can push an already alkaline garden farther out of range. Never use ash from treated, painted, glued, or unknown wood.
Test the soil and follow its fertilizer recommendation. Use a complete vegetable fertilizer at the labeled rate when needed. Too much nitrogen creates lush leaves and fewer flowers, while excessive salts can damage the new roots the deep planting was meant to build.
Compost Is an Amendment, Not a Hidden Pocket
Blend finished compost through the bed instead of placing a concentrated handful beneath the transplant. A sharp change in soil texture can hold water in the planting hole and keep roots circling there.
Protect the Plant Without Homemade Soap
Aphids and other insects should be identified before treatment. Ordinary bar soap and dish detergent vary in additives and concentration, so homemade sprays can burn tomato leaves. Prevention sprays also harm helpful insects without solving a confirmed problem.
Use a strong stream of water for a light aphid group when practical, or choose an insecticidal soap product labeled for tomatoes and the target pest. Follow timing, dilution, and pollinator directions. Spray a small area first and avoid hot bright periods.
Keep the Leaves That Power the Crop
Remove leaves that touch soil and confirmed diseased tissue, but do not strip the plant. Healthy foliage makes energy and shades fruit from sunscald. Space and support improve airflow without severe pruning.
Rotate tomato-family crops in garden beds, clean tools after diseased plants, and water at the soil rather than splashing leaves. These quiet habits support the rooted stem long after planting day.
My grandfather buried tomato stems deep, and the harvest changed completely because the method gave each healthy seedling a larger root opportunity. Warm soil, steady moisture, measured nutrition, strong support, and careful pest control turned that opportunity into fruit. The hidden roots are the clever beginning, not the whole miracle.