Dark grout can make clean tile look neglected. The tempting promise says a homemade paste will erase years of grime without scrubbing. A good paste can loosen soil, but someone still has to wipe, rinse, and sometimes brush the porous lines.
The useful trick is contact time. Baking soda, 3% hydrogen peroxide, and a tiny amount of dish liquid may lift dirt from compatible ceramic tile grout when patch-tested. They are not safe for every stone, colored grout, sealer, or surrounding fixture.
Identify the Tile and Grout
Glazed ceramic and porcelain tile usually tolerate different cleaners than marble, limestone, travertine, cement tile, or other natural stone. Acids can etch calcium-based stone.
Grout may be cement-based, epoxy, colored, or sealed. An oxidizer can lighten color or weaken an old finish.
Check installation records or ask a tile professional when the material is uncertain. Do not test a strong cleaner in the center of the floor.
Decide Whether the Black Line Is Dirt or Damage
Grease and soil sit on the surface. Mold may grow where moisture stays. Cracked, missing, powdery, or permanently stained grout can require repair rather than more cleaning.
Black marks in shower caulk often grow inside the silicone. If cleaning does not remove them, the caulk may need safe removal and replacement after the moisture cause is corrected.
A recurring wet patch may signal a plumbing leak. Fix the water source before sealing anything.
Ventilate and Protect Yourself
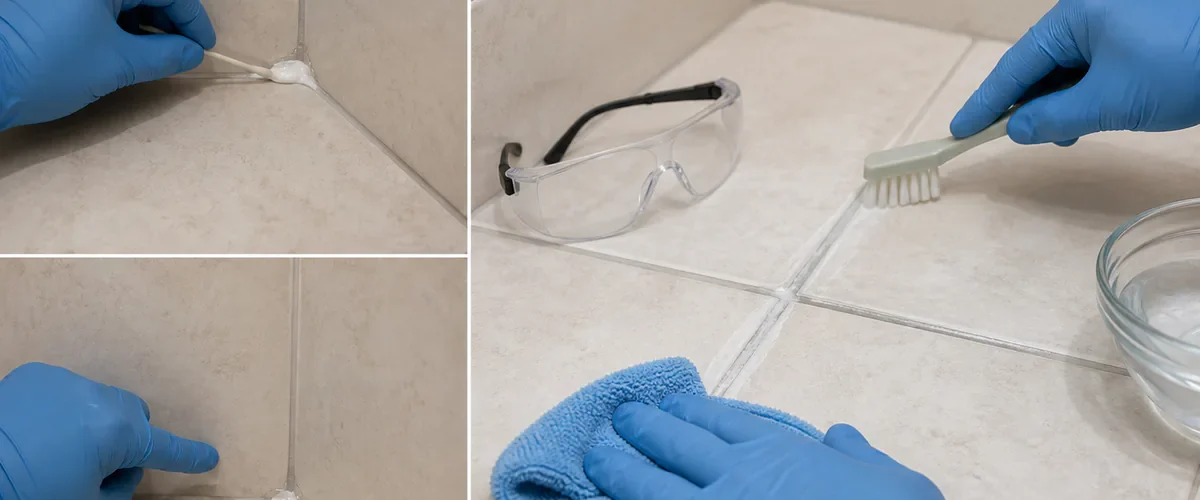
Open a window or run an exhaust fan. Wear gloves and eye protection, and keep children and pets away until the area is rinsed and dry.
Use ordinary 3% household hydrogen peroxide, not industrial concentrations. Keep it in its original opaque container because light breaks it down.
Never mix peroxide with chlorine bleach, vinegar, ammonia, or another cleaner. Rinse away residues from previous products before beginning.
Remove Loose Dirt First
Vacuum or sweep the tile carefully. Mop with plain warm water if needed, then let the grout become damp rather than flooded.
Removing grit keeps it from scratching the tile while you wipe. It also allows the paste to contact the stain instead of a layer of dust.
Mix a Small Fresh Paste
Combine baking soda with enough 3% hydrogen peroxide to make a spreadable paste. Add only a drop or two of plain dishwashing liquid for greasy kitchen grout.
Do not seal the mixture in a bottle or save it. Peroxide releases oxygen as it reacts, and a closed container can build pressure.
Make only what you will use immediately and keep the bowl on a stable surface.
Patch-Test in a Hidden Corner
Apply a small amount to an inconspicuous grout line and nearby tile. Wait five to ten minutes, then wipe and rinse.
Let the spot dry completely. Wet grout looks darker, so an immediate judgment can be wrong. Check for fading, etching, dullness, roughness, or sealer damage.
Stop if the appearance changes. Use the tile maker’s recommended neutral cleaner instead.
Let Contact Time Do Most of the Work
Spread a thin layer along compatible grout and leave it for five to ten minutes. Do not let it dry into a hard crust.
Wipe with a damp microfiber cloth. Use a soft nylon grout brush only where soil remains. A metal brush can scratch tile and erode grout.
Rinse several times with clean water so no gritty baking soda or soap film remains.
Dry Before Repeating
Allow the grout to dry and inspect in daylight. Repeat one controlled treatment if necessary rather than making the first batch stronger.
Persistent discoloration may be inside worn grout. Regrouting or professional cleaning can be safer than repeated oxidation.
Know When Mold Needs More Than Cleaning
A small surface patch caused by shower humidity may improve after cleaning and drying. Broad growth, a musty wall, soft drywall, or mold returning from behind tile suggests hidden moisture. Do not seal over it.
Fix leaks and ventilation first. People with asthma, allergies, immune concerns, or a large affected area should follow public-health guidance and consider qualified remediation. Scrubbing a visible line does not remove growth inside a wall.
Protect the Repair Afterward
Once grout is clean and fully dry, inspect for cracks and missing sections. Use a compatible repair product rather than filling movement joints with rigid grout.
Prevent the Next Dark Layer
Ventilate bathrooms during showers and until surfaces dry. Squeegee walls, repair drips, and wash kitchen grease before it hardens.
Use a grout sealer only when appropriate for that grout and tile. Clean and dry the surface first, follow cure times, and do not assume silicone caulk should be covered with grout sealer.
The “No Scrub” Secret Is a Softer Scrub
A paste can loosen grime enough to reduce hard brushing. It cannot remove loose grout, hidden mold, or a leak, and it still needs thorough wiping and rinsing.
Identify the surface, test a corner, give the mixture brief contact time, and use the softest tool that works. The lines look brighter because the cleaner had time to act, not because the cleanup disappeared.